Last week, Dynamsoft released Barcode Reader (DBR) SDK v2.0, which is available for Windows and Mac. The Windows installer contains Barcode libraries for ActiveX, C/C++, and .NET. If you are a Java developer, you have to use JNI to link native C/C++ libraries. In this tutorial, I’ll demonstrate how to invoke the native methods of Dynamsoft Barcode SDK via JNI to create a Java Barcode Reader.
![Dynamsoft Barcode Reader SDK]()
Ads Powered by Dynamsoft
JNI for Linking Dynamsoft Barcode Reader DLL
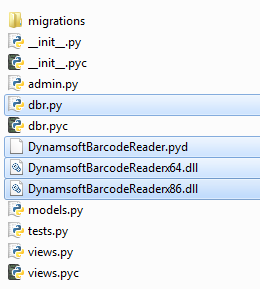
Download and install Dynamsoft Barcode Reader.![DBR download button]()
![dbr folder]()
Create a new Java project in Eclipse. We need a Class for calling native methods.
package com.dynamsoft.barcode;

import java.util.Properties;

public class JBarcode {

	static {

		try {
			// get arch
			Properties props = System.getProperties();
			String bits = String.valueOf(props.get("sun.arch.data.model"));
			if (bits.equals("32")) {
				bits = "86";
			}

			String jniLib = "DynamsoftBarcodeJNIx" + bits;

			// load dll
			System.loadLibrary(jniLib);
		} catch (Exception e) {
			System.err.println("load jni error!");
		}

}

    public native static int DBR_InitLicense(
		String pLicense	//License Key
	);

    public native static int DBR_DecodeFile(
		String pFileName,

		int option_iMaxBarcodesNumPerPage,
		long option_lBarcodeFormat,

		tagBarcodeResultArray ppResults	//Barcode Results
	);

    public native static int DBR_DecodeFileRect(
		String pFileName,

		int option_iMaxBarcodesNumPerPage,
		long option_lBarcodeFormat,

		int iRectLeft,			//Rectangle Left
		int iRectTop,			//Rectangle Top
		int iRectWidth,			//Rectangle
		int iRectHeight,		//Rectangle
		tagBarcodeResultArray ppResults	// Barcode Results
	);

    public native static int DBR_DecodeBuffer(
		byte[] pDIBBuffer,	//Buffer
        int iDIBSize,

		int option_iMaxBarcodesNumPerPage,
		long option_lBarcodeFormat,

        tagBarcodeResultArray ppResults	//Barcode Results
	);

    public native static int DBR_DecodeBufferRect(
		byte[] pDIBBuffer,	//Buffer
        int iDIBSize,

		int option_iMaxBarcodesNumPerPage,
		long option_lBarcodeFormat,

        int iRectLeft,			//Rectangle Left
        int iRectTop,			//Rectangle Top
        int iRectWidth,			//Rectangle
        int iRectHeight,		//Rectangle
        tagBarcodeResultArray ppResults	//Barcode Results
	);

    public native String GetErrorString(int iErrorCode);

}
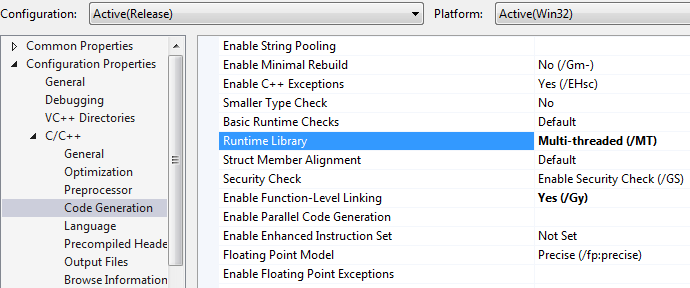
Create a new DLL project in Visual Studio, and then add Include directories of JDK and DBR.
![dbr include]()
Add Library directories of DBR.
![dbr lib]()
Declare JNI methods in a header file.
/* DO NOT EDIT THIS FILE - it is machine generated */
#include <jni.h>
/* Header for class com_dynamsoft_barcode_JBarcode */

#ifndef _Included_com_dynamsoft_barcode_JBarcode
#define _Included_com_dynamsoft_barcode_JBarcode

extern "C" {
/*
 * Class:     com_dynamsoft_barcode_JBarcode
 * Method:    DBR_InitLicense
 * Signature: (Ljava/lang/String;)I
 */
JNIEXPORT jint JNICALL Java_com_dynamsoft_barcode_JBarcode_DBR_1InitLicense
  (JNIEnv *, jclass, jstring);

/*
 * Class:     com_dynamsoft_barcode_JBarcode
 * Method:    DBR_DecodeFile
 * Signature: (Ljava/lang/String;IJLcom/dynamsoft/barcode/tagBarcodeResultArray;)I
 */
JNIEXPORT jint JNICALL Java_com_dynamsoft_barcode_JBarcode_DBR_1DecodeFile
  (JNIEnv *, jclass, jstring, jint, jlong, jobject);

/*
 * Class:     com_dynamsoft_barcode_JBarcode
 * Method:    DBR_DecodeFileRect
 * Signature: (Ljava/lang/String;IJIIIILcom/dynamsoft/barcode/tagBarcodeResultArray;)I
 */
JNIEXPORT jint JNICALL Java_com_dynamsoft_barcode_JBarcode_DBR_1DecodeFileRect
  (JNIEnv *, jclass, jstring, jint, jlong, jint, jint, jint, jint, jobject);

/*
 * Class:     com_dynamsoft_barcode_JBarcode
 * Method:    DBR_DecodeBuffer
 * Signature: ([BIIJLcom/dynamsoft/barcode/tagBarcodeResultArray;)I
 */
JNIEXPORT jint JNICALL Java_com_dynamsoft_barcode_JBarcode_DBR_1DecodeBuffer
  (JNIEnv *, jclass, jbyteArray, jint, jint, jlong, jobject);

/*
 * Class:     com_dynamsoft_barcode_JBarcode
 * Method:    DBR_DecodeBufferRect
 * Signature: ([BIIJIIIILcom/dynamsoft/barcode/tagBarcodeResultArray;)I
 */
JNIEXPORT jint JNICALL Java_com_dynamsoft_barcode_JBarcode_DBR_1DecodeBufferRect
  (JNIEnv *, jclass, jbyteArray, jint, jint, jlong, jint, jint, jint, jint, jobject);

/*
 * Class:     com_dynamsoft_barcode_JBarcode
 * Method:    GetErrorString
 * Signature: (I)Ljava/lang/String;
 */
JNIEXPORT jstring JNICALL Java_com_dynamsoft_barcode_JBarcode_GetErrorString
  (JNIEnv *, jclass, jint);

}
#endif
Add implementations in relevant CPP file. Make sure your Visual Studio can find the included header files and libraries.
#include "com_dynamsoft_barcode_JBarcode.h"

// BarcodeReaderDemo.cpp : Defines the entry point for the console application.

#include <windows.h>
#include "../../../Include/If_DBR.h"
#include "../../../Include/BarcodeFormat.h"
#include "../../../Include/BarcodeStructs.h"
#include "../../../Include/ErrorCode.h"

#ifdef _WIN64
#pragma comment(lib, "DBRx64.lib")
#else
#pragma comment(lib, "DBRx86.lib")
#endif

bool isGetClassBarcodeResult = false;
jclass    br_m_cls   = NULL;
jmethodID br_m_mid   = NULL;
jfieldID  br_m_Format = NULL;
jfieldID  br_m_BarcodeData = NULL;
jfieldID  br_m_BarcodeDataLength = NULL;
jfieldID  br_m_Left = NULL;
jfieldID  br_m_Top = NULL;
jfieldID  br_m_Width = NULL;
jfieldID  br_m_Height = NULL;
jfieldID  br_m_X1 = NULL;
jfieldID  br_m_Y1 = NULL;
jfieldID  br_m_X2 = NULL;
jfieldID  br_m_Y2 = NULL;
jfieldID  br_m_X3 = NULL;
jfieldID  br_m_Y3 = NULL;
jfieldID  br_m_X4 = NULL;
jfieldID  br_m_Y4 = NULL;
jfieldID  br_m_PageNum = NULL;

bool isGetClassBarcodeArrayResult = false;
jclass    brAry_cls   = NULL;
jmethodID brAry_mid   = NULL;
jfieldID  brAry_field_count = NULL;
jfieldID  brAry_field_brResult = NULL;

void loadJavaClassInfo(JNIEnv *env){
	if(!isGetClassBarcodeResult){
		br_m_cls   = env->FindClass("com/dynamsoft/barcode/tagBarcodeResult");
		br_m_mid   = env->GetMethodID(br_m_cls,"<init>","()V");

		br_m_Format = env->GetFieldID(br_m_cls,"lFormat","J");
		br_m_BarcodeData = env->GetFieldID(br_m_cls,"pBarcodeData","[B");
		br_m_BarcodeDataLength = env->GetFieldID(br_m_cls,"iBarcodeDataLength","I");
		br_m_Left = env->GetFieldID(br_m_cls,"iLeft","I");
		br_m_Top = env->GetFieldID(br_m_cls,"iTop","I");
		br_m_Width = env->GetFieldID(br_m_cls,"iWidth","I");
		br_m_Height = env->GetFieldID(br_m_cls,"iHeight","I");
		br_m_X1 = env->GetFieldID(br_m_cls,"iX1","I");
		br_m_Y1 = env->GetFieldID(br_m_cls,"iY1","I");
		br_m_X2 = env->GetFieldID(br_m_cls,"iX2","I");
		br_m_Y2 = env->GetFieldID(br_m_cls,"iY2","I");
		br_m_X3 = env->GetFieldID(br_m_cls,"iX3","I");
		br_m_Y3 = env->GetFieldID(br_m_cls,"iY3","I");
		br_m_X4 = env->GetFieldID(br_m_cls,"iX4","I");
		br_m_Y4 = env->GetFieldID(br_m_cls,"iY4","I");
		br_m_PageNum = env->GetFieldID(br_m_cls,"iPageNum","I");
		isGetClassBarcodeResult = true;
	}

	if(!isGetClassBarcodeArrayResult){
	    brAry_cls   = env->FindClass("com/dynamsoft/barcode/tagBarcodeResultArray");
		brAry_mid   = env->GetMethodID(brAry_cls,"<init>","()V");
		brAry_field_count = env->GetFieldID(brAry_cls,"iBarcodeCount","I");
		brAry_field_brResult = env->GetFieldID(brAry_cls,"ppBarcodes","[Lcom/dynamsoft/barcode/tagBarcodeResult;");
		isGetClassBarcodeArrayResult = true;
	}
}

jobject convertResultToJNIObject(JNIEnv *env, pBarcodeResult pBarcode){

	loadJavaClassInfo(env);

    jobject obj = env->NewObject(br_m_cls, br_m_mid);

	jbyteArray rtnbytes = env->NewByteArray((jsize)(pBarcode->iBarcodeDataLength));
	env->SetByteArrayRegion(rtnbytes, 0, (jsize)(pBarcode->iBarcodeDataLength), (jbyte*)pBarcode->pBarcodeData);

	env->SetLongField(obj, br_m_Format, pBarcode->llFormat);
	env->SetObjectField(obj, br_m_BarcodeData, rtnbytes);
	env->SetIntField(obj, br_m_BarcodeDataLength, pBarcode->iBarcodeDataLength);
	env->SetIntField(obj, br_m_Left, pBarcode->iLeft);
	env->SetIntField(obj, br_m_Top, pBarcode->iTop);
	env->SetIntField(obj, br_m_Width, pBarcode->iWidth);
	env->SetIntField(obj, br_m_Height, pBarcode->iHeight);
	env->SetIntField(obj, br_m_X1, pBarcode->iX1);
	env->SetIntField(obj, br_m_Y1, pBarcode->iY1);
	env->SetIntField(obj, br_m_X2, pBarcode->iX2);
	env->SetIntField(obj, br_m_Y2, pBarcode->iY2);
	env->SetIntField(obj, br_m_X3, pBarcode->iX3);
	env->SetIntField(obj, br_m_Y3, pBarcode->iY3);
	env->SetIntField(obj, br_m_X4, pBarcode->iX4);
	env->SetIntField(obj, br_m_Y4, pBarcode->iY4);
	env->SetIntField(obj, br_m_PageNum, pBarcode->iPageNum);

	return obj;
}

void fillBarcodeResultArray(JNIEnv *env, jobject obj, pBarcodeResultArray pArrayResults){

	loadJavaClassInfo(env);

	int count = pArrayResults->iBarcodeCount;
	pBarcodeResult* ppBarcodes = pArrayResults->ppBarcodes;

	jobjectArray swArray = env->NewObjectArray(count, br_m_cls, 0);

	for(int i=0; i<count; i++){
		env->SetObjectArrayElement(swArray, i, convertResultToJNIObject(env, ppBarcodes[i]));
	}

	env->SetIntField(obj, brAry_field_count, count);
	env->SetObjectField(obj, brAry_field_brResult, swArray);

}

void SetOptions(pReaderOptions pOption, jint option_iMaxBarcodesNumPerPage, jlong option_llBarcodeFormat){

	if(option_llBarcodeFormat > 0)
		pOption->llBarcodeFormat = option_llBarcodeFormat;
	else
		pOption->llBarcodeFormat = OneD;

	if(option_iMaxBarcodesNumPerPage > 0)
		pOption->iMaxBarcodesNumPerPage = option_iMaxBarcodesNumPerPage;
	else
		pOption->iMaxBarcodesNumPerPage = MAXINT;

}

JNIEXPORT jint JNICALL Java_com_dynamsoft_barcode_JBarcode_DBR_1InitLicense
(JNIEnv *env, jclass, jstring pString){

	const char *nativeString = env->GetStringUTFChars(pString, 0);

	//printf("%s", nativeString);
	int ret = DBR_InitLicense(nativeString);

	//DON'T FORGET THIS LINE!!!
	env->ReleaseStringUTFChars(pString, nativeString);

	return ret;
}

JNIEXPORT jint JNICALL Java_com_dynamsoft_barcode_JBarcode_DBR_1DecodeFile
  (JNIEnv *env, jclass, jstring strFileName, jint option_iMaxBarcodesNumPerPage, jlong option_llBarcodeFormat, jobject pArrayResults)
{
	const char *pFileName = env->GetStringUTFChars(strFileName, 0);
	pBarcodeResultArray pResults = NULL;
	ReaderOptions option;
	SetOptions(&option, option_iMaxBarcodesNumPerPage, option_llBarcodeFormat);

	int ret = DBR_DecodeFile(
		pFileName,
		&option,
		&pResults
	);

	if(ret == DBR_OK){
		fillBarcodeResultArray(env, pArrayResults, pResults);
		DBR_FreeBarcodeResults(&pResults);
	}

	//DON'T FORGET THIS LINE!!!
	env->ReleaseStringUTFChars(strFileName, pFileName);
	return ret;
}

JNIEXPORT jint JNICALL Java_com_dynamsoft_barcode_JBarcode_DBR_1DecodeFileRect
  (JNIEnv *env, jclass, jstring strFileName, jint option_iMaxBarcodesNumPerPage, jlong option_llBarcodeFormat, jint iRectLeft, jint iRectTop, jint iRectWidth, jint iRectHeight, jobject pArrayResults)
{
	const char *pFileName = env->GetStringUTFChars(strFileName, 0);
	pBarcodeResultArray pResults = NULL;
	ReaderOptions option;
	SetOptions(&option, option_iMaxBarcodesNumPerPage, option_llBarcodeFormat);

	int ret = DBR_DecodeFileRect(
		pFileName,
		&option,
		iRectLeft,
		iRectTop,
		iRectWidth,
		iRectHeight,
		&pResults
	);

	if(ret == DBR_OK){

		fillBarcodeResultArray(env, pArrayResults, pResults);
		DBR_FreeBarcodeResults(&pResults);
	}

	//DON'T FORGET THIS LINE!!!
	env->ReleaseStringUTFChars(strFileName, pFileName);
	return ret;
}

JNIEXPORT jint JNICALL Java_com_dynamsoft_barcode_JBarcode_DBR_1DecodeBuffer
  (JNIEnv *env, jclass, jbyteArray pDIBBuffer, jint iDIBSize, jint option_iMaxBarcodesNumPerPage, jlong option_llBarcodeFormat, jobject pArrayResults)
{
	pBarcodeResultArray pResults = NULL;
	ReaderOptions option;
	SetOptions(&option, option_iMaxBarcodesNumPerPage, option_llBarcodeFormat);

	int ret = DBR_DecodeBuffer(
		(unsigned char*) pDIBBuffer,
		iDIBSize,
		&option,
		&pResults
	);

	if(ret == DBR_OK){
		fillBarcodeResultArray(env, pArrayResults, pResults);
		DBR_FreeBarcodeResults(&pResults);
	}

	return ret;
}

JNIEXPORT jint JNICALL Java_com_dynamsoft_barcode_JBarcode_DBR_1DecodeBufferRect
  (JNIEnv *env, jclass,
  jbyteArray pDIBBuffer, jint iDIBSize, jint option_iMaxBarcodesNumPerPage, jlong option_llBarcodeFormat,
  jint iRectLeft, jint iRectTop, jint iRectWidth, jint iRectHeight, jobject pArrayResults)
{
	pBarcodeResultArray pResults = NULL;
	ReaderOptions option;
	SetOptions(&option, option_iMaxBarcodesNumPerPage, option_llBarcodeFormat);

	int ret = DBR_DecodeBufferRect(
		(unsigned char*) pDIBBuffer,
		iDIBSize,
		&option,
		iRectLeft,
		iRectTop,
		iRectWidth,
		iRectHeight,
		&pResults
	);

	if(ret == DBR_OK){
		fillBarcodeResultArray(env, pArrayResults, pResults);
		DBR_FreeBarcodeResults(&pResults);
	}

	return ret;
}

JNIEXPORT jstring JNICALL Java_com_dynamsoft_barcode_JBarcode_GetErrorString
  (JNIEnv *env, jclass, jint iErrorCode)
{
	const char *pError = GetErrorString( iErrorCode);
    return env->NewStringUTF(pError);
    // (*env)->ReleaseStringUTFChars(env, jstr, utf);

}
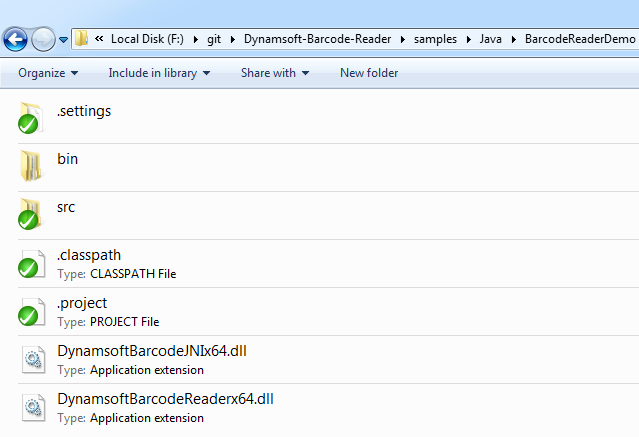
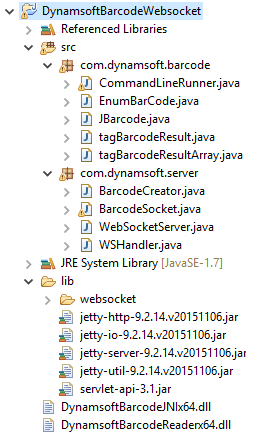
Build the project, and copy the generated DLL and DBR DLL to the Java Barcode Reader project.
![dbr java]()
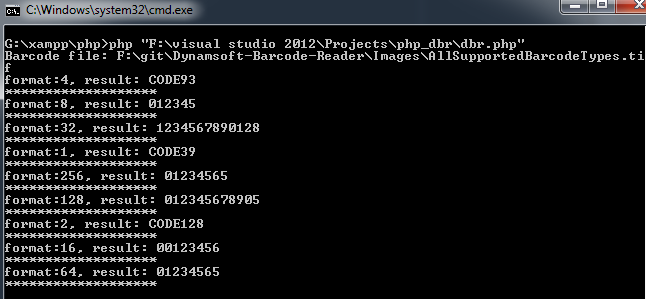
Finally, we can specify the image file path as the argument, and run the Java project.
![dbr args]()
![dbr results]()
Source Code
https://github.com/Dynamsoft/Dynamsoft-Barcode-Reader/tree/master/samples/Java